Showing posts with label Projects. Show all posts

Sunday, May 3, 2015

Pinterest Food Challenge Day Four: Pretzel Dogs

I will start by saying, our weekend got away from us and we weren't able to stick to our challenge. We were having way too much fun to think about cooking. Tonight, we were back at it. We have rearranged our schedule, but will still make all of the dishes listed in the first challenge post. This time, Pretzel Dogs!!

I was a bit intimidated by the idea initially, but they turned out amazing! I thought that I would ruin this recipe for sure, but it was much easier that I thought. I read one of the comments, which said something along the lines of "to get a true pretzel flavor, do this....and this...". So I wasn't expecting a wonderful pretzel flavor, but boy was it there. The bread tasted exactly like a soft-baked pretzel and paired nicely with the hot dogs. I ended up with a bit extra dough, so I made some extra pretzels to send in Liam's lunch box this week.

Again, both boys really enjoyed the meal. Liam ate an entire pretzel dog (which were quite large) and an extra pretzel. Both smothered in ketchup and mustard. Joe was pretty excited that there were only two left, because then there is not enough for another dinner, meaning.........he gets to take the leftovers for lunch tomorrow.

If you are interested in the recipe, click this link: Pretzel Dogs


Thursday, April 30, 2015

Pinterest Food Challenge Day Three: Pork Schnitzels and Mashed Potato Pancakes

Due to my head cold, we took yesterday off from our food challenge. My poor kiddos had to eat boxed macaroni......again. We will move the recipe that we should have done today to Monday, so stay tuned!

As for today, both recipes were quite yummy. As with every dinner in our house, one boy likes one thing on his plate and the other one likes something else. This evening was no different. Liam loved the pork and Nolan loved the potatoes. Joe and I like both. I do have to say that I would not pair these items again. They tasted great together, but it was too much fried food in one meal.

As with the other two recipes, everything took longer than suggested. The one change though is that the actual cook time (for both recipes) needed to be longer. Both the pork and the potato pancakes needed to be flipped about 5 minutes in rather than the 2-4 minutes listed on the recipes.

If you are interested in giving either of these recipes, the links are right here!

Pork Schnitzels

Cheesy Leftover Mashed Potato Pancakes


Monday, April 27, 2015

Pinterest Food Challenge Day Two: Enchilada Casserole

This post will be short and to the point. This recipe is awesome!! It earned two thumbs up for the two year old, and four (don't ask) from the five year old. My husband and I loved it as well. I'm hoping it is just as good the second time around, as we ended up with enough to have it again tomorrow night (barely, as I had to have two helpings tonight).

The only changes that I would make to the recipe are to, once again, change the prep time as this mom took far longer than the allotted 10 minutes. Also, I made our casserole in a 9x13 pan, which required four tortillas rather than the three which the recipe lists. I may try to make it in a smaller pan next time, so we end up with more, thicker layers of goodness.

Either way, this recipe was a hit!

Want to give it a shot? Here is the link: Enchilada Casserole


Sunday, April 26, 2015

Pinterest Food Challenge Day One: Teriyaki Turkey Meatballs

Today was day one of our Pinterest Food Challenge. Throughout this week, our family will only eat my pinned dinner ideas. Today was Terikayi Turkey Meatballs with rice and egg rolls.

We chose this meal because it is a crockpot recipe, which we love to make on Sunday afternoons. I will start off by saying that we all loved the flavor of the meatballs and the Teriyaki sauce, even the boys! They were very flavorful, juicy, and easy to make. However, as with most recipes, the prep time of ten minutes was not at all at my "non-chef" speed. It was more like 30 minutes. Also, my meatballs didn't quite look like hers. My sauce was not as thick as I expected, although still very tasty.

The only modification we made to the recipe given was to not add the optional sesame seeds, otherwise we stuck to her instructions and ingredients. When I make these again, the only change I would make, is to bake them in the oven a bit longer. I like a crunchier texture to the outside of a meatball. The recipe made enough for two family dinners, so we packed up the leftovers and popped them in the freezer for another day (we will see how that goes).

My family would recommend this recipe to others, even the five and two year old! Give it a try!

Link to the recipe: Slow Cooker Teriyaki Meatballs


Saturday, April 25, 2015

One Week Pinterest Food Challenge

I love Pinterest. I spend far too much time scouring pin after pin. I have pinned close to 3,000 things, all with the intention to use them in some way. I, like most "Pinners", rarely actually do anything with them. My Pinterest page has turned into a graveyard of all my good intentions and creative inspirations.

My husband and I are waiting to get my son's blood test results, which could shed a lot of light on some uncomfortable symptoms he has been dealing with. Obviously, I'm going crazy waiting. So the only sane thing to do is to give myself something else to obsess about.

Our family always struggles with what to make for dinner. We procrastinate, until we give up and make boxed macaroni.....again, or make a quick stop at Taco Bell. Our stomachs and our food budget are not feeling so hot.

Three issues, one solution: A One Week Pinterest Food Challenge!

For one week, our family will only eat dinners found on my Pinterest profile. We will use the recipes that I, apparently, thought looked delicious. We created the menu for the week, will shop for any needed ingredients tomorrow, and spend the next week trying new recipes. Each day I will post a review of the recipe made, including how the kids liked it, as well as a link to the website where the recipe can be found.

While narrowing down our long list of pinned recipes, I learned a couple of things about items found on Pinterest. 1. Many of the "easy" recipes are not, in fact, easy. 2. Many of the websites which the pin takes you to have nothing to do with what you pinned or the page is inaactive. 3. Every website associated with recipes comes complete with pop-up and ad, after pop-up and ad. So, this little project also helped me to clean out my food board.

Our Menu

Sunday- Teriyaki Turkey Meatballs, rice and egg rolls
Monday/Tuesday- Enchilada Casserole
Wednesday- Pork Schnitzels with Mashed Potato Pancakes
Thursday- Herb Crusted Chicken in a Basil Cream Sauce with Pasta
Friday- Pretzel Dogs and Extra Crispy Oven Baked French Fries
Saturday- Buffalo Chicken Garbage Bread
Sunday- Crisp Meat Burritos 

I'm very excited to have something silly to focus on, to put my hours for pinning to good use, and to find some new, yummy recipes to add to our families short list. Let the challenge begin!


Sunday, April 19, 2015

Sprucin' Up the Place

From the moment we set foot in our current home, we know that it was going to take a great deal of TLC to get it to sparkle the way we knew it could. The house was a rental for many years, then sat empty as a short-sale for two years, before it became ours. As you can imagine, it needed a good scrub-down, paint, and just plain love. We have lived here for just over a year and are making a great deal of progress toward making it the dream home we have always known it has the potential to be.
Half Bath with New Floors

We began making changes before moving in. We had the 12 year old cream carpets cleaned, the house was cleaned top to bottom, and most rooms were painted. As we began unpacking our things, we noticed just how well the house had been kept. Other than sitting empty and not being updated over the years, it really had been given a lot of attention and upkeep. The kitchen cabinets were in amazing shape, the light fixtures were lovely, and the overall feel of the house changed the second we put our things into it.

Before and After Living Room
Before and After Dining Room
After a few months, we began our renovation projects. We started with the half bath, our boy's bedroom, and the loft. You can see all of these projects on my past post, Creating a Home We Love. Just this week, we tackled our most anticipated of changes. The floors. We have been so proud of our new home, however, the yucky carpet has made us hesitant to invite people over. It has been a flat-out embarrassment. We had planned to put it off for a few more years, but we just couldn't wait any longer.

Since flooring is so expensive, we want to take our time between projects, and we don't want to settle on a single detail, we decided to stick to just the downstairs flooring. We had the worn out, stained, and I'll say it, smelly carpet removed. It has been replaced with my new love, engineered hardwood floors in Chocolate. We love the color, look, and texture of these floors!

Before and After Family Room
It was quite the project, as we had three good-sized rooms as well as a pantry and the half bath to cover. We have always thought that the way that our living room, dining room, and kitchen flow, it would look best if all rooms had consistent flooring. I think we were right. We love the way that the flooring changed all three rooms, as well as helps to create a beautiful flow to our home. 

We also took on the family room flooring. We once again, removed the gross carpet and replaced it. This time we decided to stick with carpet, but went from cream, worn carpet, with fluffier, speckled carpet. We wanted to keep the cozy, homey feel as our boys wrestle and play on these floors. Once again, it transformed the room. Everyone loves to lay on it because it is so soft and comfy. 

Now we are proud to have visitors, we are proud to say this is our home, and we can see the potential coming to life. 

Saturday, January 17, 2015

A Train Themed Birthday

My two year old loves his "choo choos", so when thinking about a theme to celebrate his birthday, trains were an easy sell. I started planning about a month in advance. Well, I started organizing ideas in my head. Fast forward four weeks, and you would see me frantically throwing things together, hoping for the best. This was (by far) not my most thought out party, nor was it the best organized, but I think it turned out pretty well. If I do say so myself. Here are my my long-planned, yet hastily executed results.


As guests arrived at the party, they were greeted with a railroad crossing sign, compete with neon, reflective "flashers". I love to welcome party goers in a festive, fun way. It may seem like a silly touch, but I think it helps to get everyone into party mode. It transforms my normal, everyday home into "Train World".

Next I worked on one of my favorite party-planning tricks, the picture frame sign. To go along with the train theme, gifts were left in the "Luggage Drop-Off" area and the party favors were located at the "Baggage Claim". As usual, this was one of the easiest things to do, but got tons of compliments. Everyone loved the simplistic idea and that it carried on the theme.

My next order of business was food. You can't have a good party, without good snacks. I love to bake, but I find it too stressful to try to organize food, bake it, wrap up all other party prep, and then socialize freely. Birthday parties are where I tend to take a foodie backseat. I still want to provide yummy treats for my guests, so I think long and hard about what to serve, but most likely, it won't be homemade.

The easiest place to begin was drinks. Simple. Water and coffee for adults, juice for kids. Everyone was happy. To add locomotive flair, I added tags that said "Chugga Chugga" to the drinks, then tags that said "Chew Chew" to the cookies (our treat of choice).

Speaking of cookies, we have a long-running tradition of having cookies instead of cake. We love that they are so versatile. No matter what the theme, cookies work. We also enjoy that they require no prep (before or during the party). I don't have to take time out of my visits to cut the cake, serve it, and clean up after it. I can pass around the basket full of cookies, guests can choose their favorite variation.

We have found a fantastic, local bakery that is creative, fun, and delicious. Year after year, they knock our socks off! This year was no exception. We talked into their bakery, less than two weeks ago, told them the theme would be trains and that the color scheme would be red and blue, and this is what they came up with. Amazing!

On to the snacks! I started with an idea. A snack train, where each "car" carries a snack representing something that would actually be transported on a train. Obviously, I also wanted the snacks to be tasty for kiddos and adults too. I also needed a way to store these snacks that could serve as train cars. Lastly, I wanted to find a fun way to share the food names with our guests. Here is the end result:


Rectangle-shaped containers stacked with animal crackers (livestock car), Veggie Straws (lumber car), chocolate covered peanuts (coal car), pretzel sticks (log car), and fruit snacks (produce car). The train was led by a toy engine and ran on tracks made with electrical tape stuck to the counter top.


The last task at hand, was to create the parting gifts of my Teddy Bear's buddies. I wanted to stick with the train theme, through and through, so I scoured the internet to find fun train-themed gifts. Luckily I did this part early on! I found and ordered conductor whistles, added a flashlight and a cute tag reading, "Thanks for making my Birthday Party a STOP on your trip!" and tied it all up with a bow.


It was a frantic, busy, amazing day and I wouldn't change a thing! My little man had the time of his life, we spent the day surrounded by those who love our Teddy Bear, we received a ton of compliments, and it really was quite easy to throw together, even if it was VERY last minute. I love throwing parties, planning for them, decorating, and hosting, but the very best part of hosting a birthday party, is the smiles I see on the little man pictured below. It's all for you Nolan!

My little conductor


Friday, July 11, 2014

Creating a Home We Love

My husband and I are always on the lookout for thrifty ways to make our home beautiful. When we were looking at our current home, we almost walked away from it, because it was so plain, whitish, and dingy, it made us think that it would need a lot of work to get it in tip top shape. I'm so glad we looked past our initial reactions, because after just a few short months of living in our new home, and minimal expenses, we have transformed it into the beautiful home we have always wanted.

We have big plans for actual renovations, updates, and personal touches, but for now, with the need for a budget-friendly fix, we are so happy with the changes we have made. When we moved it, our first order of business was to repaint the main living spaces to take care of the dingy feeling of a home that had not been lived in for over two years. This went a long way, but we had even bigger plans for a couple choice rooms.

First, we focused on our son's new bedroom. It was very hard for him to leave our first home. To help him get excited about the new house, we let him choose the colors/theme of his new bedroom, which we would have up and ready by the time we moved in. Little did we know, that he would choose two, lets say interesting, color choices. Red and golden (he also threw black in there, but that's where we drew the line). It took us weeks to figure out a way to give him what he wanted, while still making his room tasteful and doable for us. A friend made an awesome suggestion, and we went with it. We painted the top of the room white, the bottom red, and added a golden stripe between them. We all loved the outcome, especially our little man.
Before                                             After  
Next up was our spacious but blah loft. We have always planned for this area to be a playroom for our boys, but the whitish walls made the room seem boring and dirty. So, we found a kid friendly color pallet and chose two colors that would look well together. We painted the top two thirds of the room the lighter of the two, and the bottom third the darker. We then added a chair-rail to tie it all together. I LOVE this room! I have always wanted an older home with character, and I think that our remodel gives it just that. Character!
Before                                                After 
Last, was our half bath. Once again, the room was dirty and white. This time, we had to worry about it about the size of the room when considering colors. Since the bath is quite small, we wanted a light, neutral, yet interesting color. We chose a light blue/green. We also switched out the boring, plain mirror for one with lots of character. These two small fixes, have given the room a huge improvement.
Before                                             After
As I said earlier, we still have some BIG plans for the rest of the house, but these easy, inexpensive changes will help to tide us over until we are ready to make bigger updates. The fact that this will be our home for many years to come, makes each of the projects we complete, all that more satisfying and exciting. We can finally make our home, ours!

Monday, July 7, 2014

Super Hero Party

My son is a huge super hero fan. He loves them all, but his favorites are Flash and Hulk. When it came time to choose a theme for his party, he couldn't decide between the two. So, he didn't! 

I love to be creative with parties. I find nothing but pleasure in planning and throwing them. I try to be creative with theme, decorations, party favors, food, etc. Once again, I scoured my brain for ways to make sure that this Super Hero party wouldn't be a generic, cookie cutter version. My first assignment, was the food. There is an amazing bakery, here in Sherwood, that creates beautiful, yummy treats. We used them a few years back for another one of Liam's birthday parties. We asked them to create Hulk hands and Flash lightening cookies. They turned out awesome, and were a huge hit!

The next order of business was themed (yet, not canned) decorations. I went simplistic this time around. Putting out colored table clothes, napkins, plates, and silverware and pairing them with a few of Liam's toys. I put together a themed table for each of the heroes, and moved on to more important things......party favors!


I have to say, that this is one of my proudest party ideas. I'm a reading teacher. My boys love books. Normal party favors tend to be cheap toys, candy, and nick knacks that are thrown away. I wanted to make Liam's party favors useful, memorable, and worth taking home. So I went with books!

I searched local book stores, Facebook buy/sell pages, and garage sales, for new/like new children's books. I was able to come up with quite a stash for less money than the normal goodie bags would require. I displayed the book options in a decorative basket, near the front door, so as not to forget them. This also allowed the children, to flip through and choose the book that they wanted, while heading out.

To personalize the gift for Liam and his guests, I typed up and printed a little note on address labels and stuck them on the front cover of each book. Once again, our guests loved the idea! I have received more compliments on this idea, than any other. I'm so happy that everyone liked it, and I love that it promotes reading!


The last hurtle to get the party started, was an activity for the kiddos. I hate party games. Especially, for infant/toddler parties. Kids just want to play. Party games are complicated, can be difficult to organize, and they require that someone who is throwing the party, be taken away from their guests to facilitate. I'm just not a fan. In past parties, I set up a cookie decorating station, homemade playdough, Mr. Potato Head felt game, and created a punch for the prize game, You can check out these ideas at Teddy Bear Picnic Birthday Party and To Infinity and Beyond!

This time, I created bookmarks that went along with the Hulk/Flash theme. I printed them in black and white, and put markers and crayons on the same table. This way, each kiddo would leave the party with a book and bookmark that they colored, and would have a fun, calm activity to do, while at the party.

This was a super easy and simple way to throw a birthday party, and I got nothing but compliments for how it turned out. I learned that parties don't need to be fancy, expensive, and super-structured to be a hit. They just need to be well thought out and creative!

Monday, January 27, 2014

Teddy Bear Picnic Birthday Party

Since my baby boy was a wee squiggle, swimming in my tummy he has had two nicknames- Gummy Bear (given to him by his Auntie Alyssa, because she said that he looked like one in the ultrasound photo), and Teddy Bear (his middle name is Theodore, after my husband's grandfather). So it was only natural that his first birthday go along with these nicknames. In searching for Teddy Bear themed party ideas, I quickly realized that everything was for baby showers, and NOT birthday parties. Well, I wouldn't let that detour me! I had done a home-made birthday party before-my oldest son's 2nd birthday was Toy Story themed, and I made everything from: activities, decorations, signs, cupcakes, snacks, games, art projects, etc. I could do it again..........so I did.

I scoured Pinterest for ideas, then I was on the prowl for anything and everything that just might work. I don't know if I'm extremely lucky, or if planning ahead, looking in several places, and being open to changes is the answer, but it all fell into place perfectly. I love the Teddy Bear Picnic song, and we have a plethora of the stuffed scoundrels lying about our home, so once again.....I went with it.

Here is how it turned out, where I purchased the supplies, how I made the projects, and other miscellaneous things you might want to know, when planning a similar birthday extravaganza:

 Don't Forget Your Disguise!
A line in the song refers to all the Teddy Bears wearing a disguise to their big party, so our guests got to wear them too. Bear-ear hats were waiting right inside the door, with a sign reminding them to take one. They were easy to make, only required a sharpie and brown paper, and the kiddos LOVED them. They wore them all day, and many took extras home.


Teddy Bear Picnic Table
This is the "picnic" table where the goodie bags, and yummy treats were housed. Gummy Bears, sandwiches, Teddy Grahams, Trail Mix, cupcakes, and adorable bear cups to store the tasty treats, were laid out for snacking.


Teddy Bear Picnic Framed Lyrics
Also, a Dollar Store picture frame displayed a verse of the Teddy Bear picnic song. These were placed throughout the house for people to read. I tried to match the verse with the activity that would take place in that area. Now, these verses are hanging in my Teddy Bear's bedroom. What a great keepsake!

Picnic Party Favor
Each child that attended the party went home with a Teddy Bear plate, set of silverware, and a Teddy Bear storage container filled with gummy bears or teddy grahams (depending on their age). I was told by several parents that they loved this idea, because their kids were getting something they would actually use. The kids were begging to eat dinner with their new plates/silverware, so I'm guessing that they liked the idea too.

Cookie Decorating Station
This was one of the best ideas! The kids absolutely loved decorating their own teddy bear cookie. It was nice for me, because that was one less thing I had to prepare before the party, and it was nice for the parents/kids because the kids were entertained. It was extremely easy to set up, required little time, and was very inexpensive.

1st Birthday Picture Collage
I made one of these for my older son's second birthday, and it is still hanging in his bedroom almost two years later. It was a mommy-favorite, and more than anything, I wanted to do it again for my little Teddy Bear. Cut out the number needed from a cardboard box, glue/tape pictures to cover the cardboard, then hang! It's so fun to see the changes in your baby when sorting through the pictures, and it's fun to reminisce with party guests when they take a peek.
 Easy Teddy Bear Cupcakes
This is the easiest decoration idea yet! Bake cupcakes, frost, stick a teddy graham on top. Done. Quick, easy, inexpensive, and everyone loves a cupcake with a little something on top.

Teddy Bear Ice Cream
No picture of this sweet treat. Sorry! But it is also a wonderful way to make good use of that cookie cutter. We thawed, then refroze ice cream into a foil pan. Then when it was time for ice cream, we pulled out our trusty cookie cutter, and used it to "scoop" the ice cream. There was a little trial and error (1.take the ice cream out and let it sit for a bit before trying to cookie-cutter it. 2. Warming the cookie cutter under hot water first really helps), but it was so so cute, and the kiddos were so excited to get a teddy bear-shaped ice cream.

 Teddy Bear Sandwiches
These were awesome! Everyone loved them, and they were so easy to make. Since bears like fish, we made tuna sandwiches, then used the same cookie cutter (we were getting as much use of the thing as we could) to cut out adorable little teddy bears. I'm still in love with this idea, and I think I will try to do it again for future parties of various themes.
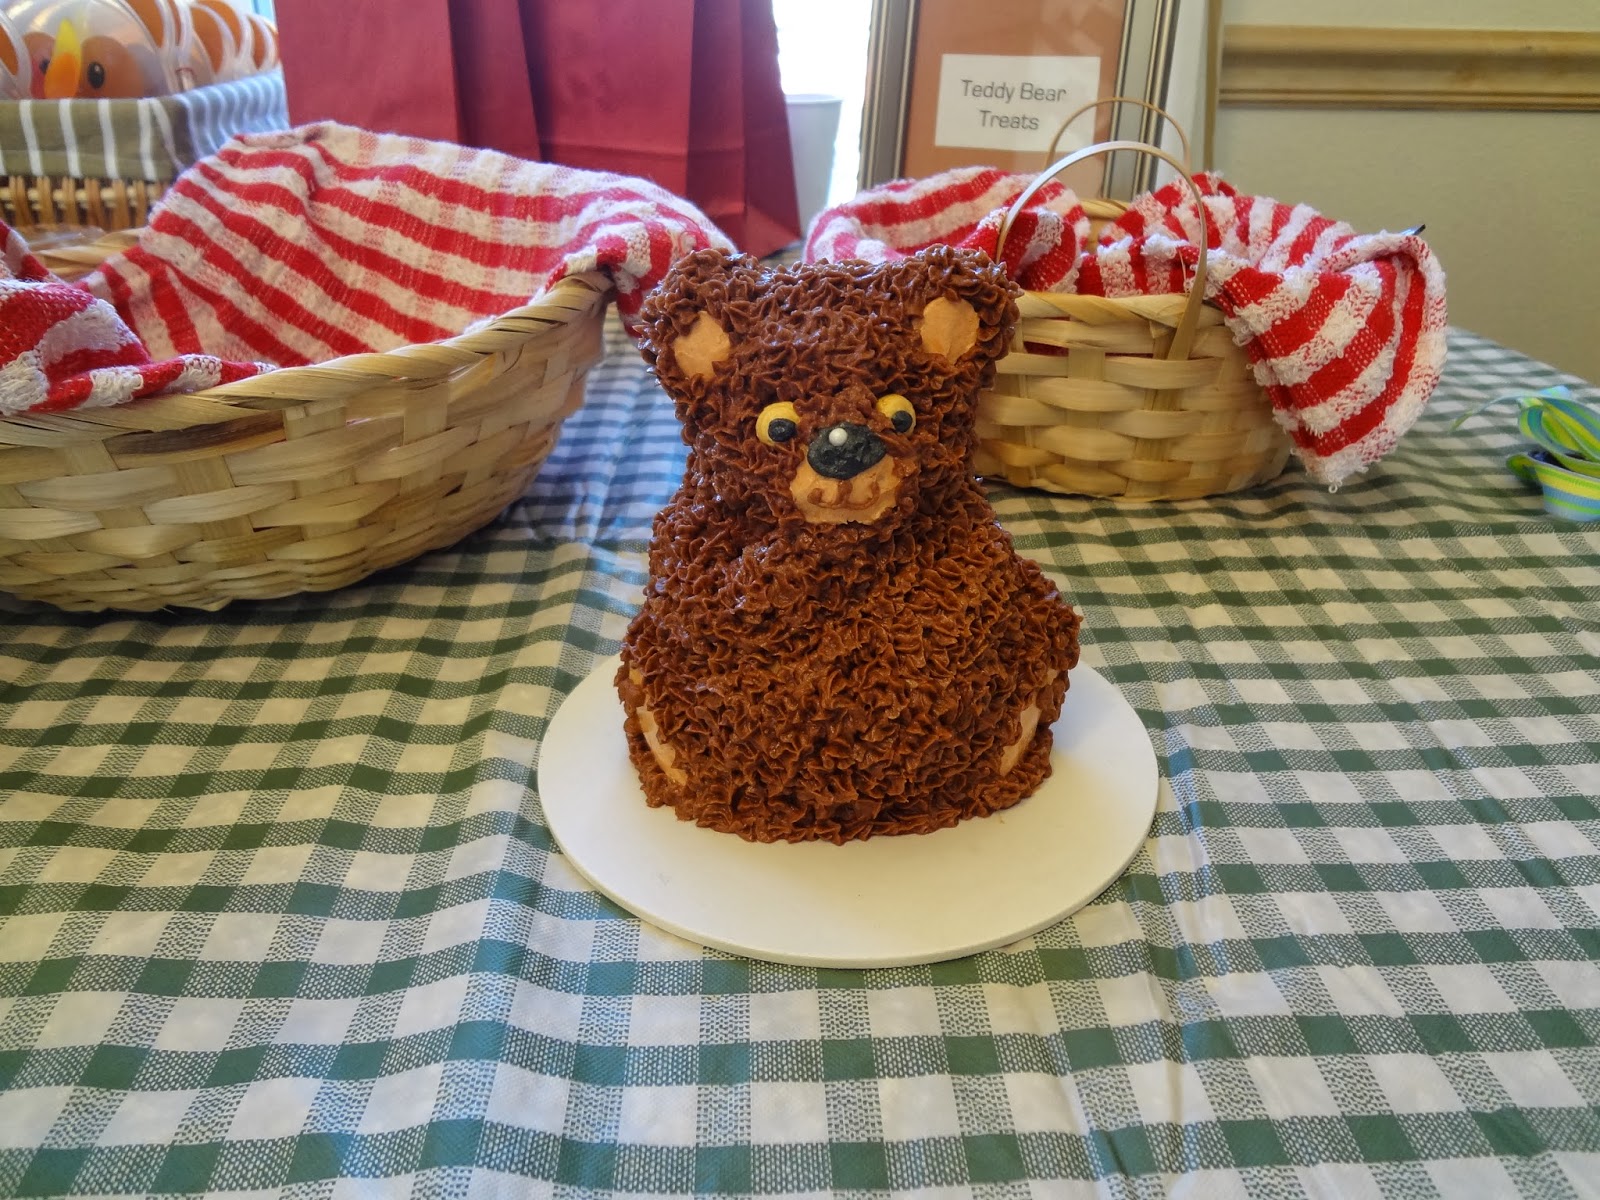
Teddy Bear Smash Cake
Everyone one year old needs his or her own cake on their birthday. We enlisted the help of the boys' Meema in making a teddy bear cake, just his size. It was perfect for our little guy, and it was oh so sweet!

In the end, I'm so glad that I couldn't find any generic red and blue checkered plates with teddy bears on them. I enjoyed making this party unique and special, and I enjoyed seeing how much everyone who attended enjoyed the little touches. More than anything, I love that I can show my little Teddy Bear pictures of this wonderful day, and tell him that his mommy did this all for him!

Thursday, October 31, 2013

Homemade Halloween

All Dressed Up!
This year, we went all out making our Halloween fun, and homemade. We started out the day, by making Liam's favorite pumpkin muffins. He loves helping in kitchen, and he loves it when we take the time to make something special on a school day. After eating our yummy breakfast, we headed out to his preschool Halloween party, where he got to wear is costume all day! When the work day was finally over, we all headed home to get into our costumes, and head to the Great Grandparent's house to visit.

Homemade Juice Box Costume

Liam decided that he would be "black Iron Man", also known as War Machine. I ended up in an old man costume- an old sweater of Joe's, a golfing hat, and glasses that came equipped with a big nose and a mustache (all found in Liam's dress up stockpile). Nolan was, thanks to his brother's awesome suggestion, a juice box. I spent the past few days trying to make his costume just right. I wasn't 100% happy with the finished product, but I will always love it, as I made it, and it was his first Halloween costume.

Hot Dog Mummies!
When we returned from our visit, we had a yummy, festive dinner of hot dog mummies! Liam LOVED them!! They were the perfect Halloween dinner, in that it was super quick, easy, required only two ingredients, and a kid favorite. Liam's favorite part was adding the "blood" (ketchup), and biting off the appendages.

After eating, we were finally ready for Trick or Treating! This was the first year Liam really seemed to be into it. He was leading the pack yelling, "Come on guys!" the whole way. We got a ton of wonderful comments/compliments on Nolan's costume, which made Liam quite proud. But it didn't take long for my little man's legs to get tired, and we headed home to answer the door for other Trick or Treaters. Joe was super excited that he was actually able to use his strobe light and fog machine. We had a wonderful day!

Saturday, October 12, 2013

Beer-Tasting Birthday Bash

Snack Buffet
Surprising my husband is never easy. I have only been successful once before, years ago. Surprising him is even more complicated when a big birthday milestone, like 30, is looming. I knew that to have a big celebration, it would have to be unknown to him, as he isn't someone who likes the limelight, and doesn't like to spend a lot of money on things like this.

Knowing that shocking him was my only option, I worked very hard and utilized every sneaky skill I have. The complication of the situation was multiplied by the fact that we moved two weeks ago, and our house is just getting organized. Luckily for me, our friends and family are wonderful accomplices, who are also very good at keeping big secrets, because the plan went off without a hitch!

Easy Beer-Themed Decoration
The theme of the party was Beer Tasting, which I knew my hubby would love, as he loves to try new brews. I asked that each guest bring a favorite beer, which helped us to have WAY more than enough to go around, several options for everyone to try, and cut the cost a bit for me. It was a hit! Everyone enjoyed the evening, loved the tasting aspect, and it was super laid-back (just like Joe). I added to the theme, by having quite a few pub-like snacks: pretzels, peanuts, beef jerky, chicken wings, and little smokies.

Joe is not a huge cake fan, he usually requests banana cream pie, so when we tasted a cupcake version at one of the many summer festivals we attended. I kept the contact information for several months with every intention of ordering several dozen for the party. I wrench was thrown into that plan, when I contacted the baker a week before the party, and she informed me that her business had moved several hundred miles away, and she would be unable to supply the treats.

Banana Cream Pie Cupcakes
I scoured  my cookbooks, Pinterest, and several other recipe websites, hoping to find something that would have a similar affect. After days of looking, I bagged the idea of using someone else's recipe, and created my own version. I have to say, they turned out pretty tasty, and looked pretty awesome (until the whipped cream started to weep). My picky, cake-hater, loved them! Unfortunately for me, over-estimated the appetites of our guests, and make about 30 too many. At least they were mini-cupcakes, so really that isn't too bad. Joe isn't complaining though! Both he and Liam, have already had a few for breakfast. If you would like the recipe, check out Banana Cream Pie Cupcakes.
It turned out to be one of the best parties I have planned, and Joe was not only completely surprised, but we are so happy and thankful to have such wonderful people to share such a big milestone with.
The Big Surprise!

Thursday, May 16, 2013

Backyard Renovation

For the past couple of years, my husband and I have thrown around ideas for making our backyard a more enjoyable place for our family and friends. We finally agreed on a couple of projects, and extending the fence was the first one we wanted to get through. We chose to re-do the fence for a couple of reasons.

1. We live on a corner lot and have a HUGE front yard, which can be difficult to keep up on (especially in the Spring). Extending the fence would make front yard maintenance far easier. 2. We had a HUGE side yard which was a waste of space. Our front yard isn't fenced, so our boys couldn't enjoy the space without constant supervision. 3. Our backyard was a great size, but we hope to eventually extend the patio and add a play structure. Doing these two projects would make our original backyard feel cramped, and would not leave us with much grass space.

Once again, we put a call in to my dad, who has his own repair/remodel business. He also helped us with our closet renovation project last spring. See Renovation: Week One and Drum Roll Please......, if you would like to see that project. He came by, took some measurements, and gave us a quote for the project. We got started the next day!

Here is what our backyard looked like before the renovation:

Our fence ended at the back of the house, and only went out about 3 feet. After finding out that we only needed 8 feet of clearance from the sidewalk to the fence, we realized, that we could go out another 8 feet past our original fence placement. It was a no-brainier!

Day One: My Dad tore down the old fence, saving the boards that we still usable. Unfortunately, I didn't take any pictures at this point, but you can tell in the pictures of Day Two how open it made it.

Day Two: Dad put in the posts (all but one), started the retaining wall that would make the additional yard space level with the existing backyard, and the huge mound of compost dirt was delivered. He left out the one post, so that the truck could back into the yard.


Day Three: Dad searched through the old boards to find ones to use on the ends of the fence. This was a difficult and time-consuming project, as the past fence was built with a mismatch of supplies, which we didn't know until he tried to reuse them. Then started on the end by the house, finished the retaining wall, and leveled some of the dirt.


Day Four: He put up the new side of the fence, and continued to fill in the slope of the yard with more dirt.

Day Five: Dad finished up the fence, and leveled the yard, yet again. We finally had a finished fence, and could let Maizy (our dog) out for potty breaks without supervision!


We still have a pretty large mound of dirt, but it is wonderful compost dirt and we will slowly use it in our flower beds. We still have some work to do to finish the project (move the remaining dirt and plant grass), but it looks amazing! Our future backyard projects include putting in a new patio, planting fruit trees in the newly smaller side yard, add a play structure, and put in some sort of patio cover. So stay tuned for more renovations!