Showing posts with label Money-Saving Tips. Show all posts

Sunday, September 14, 2014

Given' it a Go

For months, I have struggled with creating a healthier menu for our family. Since we have been so budget-conscious for the past three years, we have been living on foods that consist of the coupon-worthy/last until the end of time variety. Although I know we are trying to do the best we can with what we have, I think that there has got to be a way to do better! That is why Joe and I are giving a natural, non-processed, non-boxed meal plan a try. Due to our budget constraints, this will take some planning and preparation, but we are committed to giving it our best, beginning Oct.1st.

Our goal is not to be on a "diet", nor is it to put restrictions on our boys, it is to make sure that what we eat is the most simple, healthiest food available. Get back to the basics, as it were. We are a very active family, and we want our food to work with that lifestyle. We have always tried to instill a love of "real" food in our children. We have a garden, which we plant, water, harvest, and create meals from as a family. This has become a cherished part of our time together.

The gist of our game plan:
1. Cut out packaged foods
2. Focus on fruits, veggies, whole grains, and lean meats
3. Make and/or bake all our meals from the purest ingredients possible

Plantin' some corn
Based on our own family needs, there will be some exceptions to the rules:
1. Baking ingredients are fair game. I see them as essentials, and refuse to drop them from our diet.
2. If at a restaurant or are guests in someone's home, we eat what is offered. Our goal is not to be rude or impose our experiment on others, but if friends/family come our way, we will make the meal based on our new guidelines. GUESTS BEWARE!

I know this will not be easy, could be quite time-consuming, will probably be budget-strenuous, and could require a great deal of imagination, but I think it will be totally worth it!

Stay tuned for our weekly menus, the ups and downs of our foodie adventure, and how it all pans out (pun intended)!

Friday, July 11, 2014

Creating a Home We Love

My husband and I are always on the lookout for thrifty ways to make our home beautiful. When we were looking at our current home, we almost walked away from it, because it was so plain, whitish, and dingy, it made us think that it would need a lot of work to get it in tip top shape. I'm so glad we looked past our initial reactions, because after just a few short months of living in our new home, and minimal expenses, we have transformed it into the beautiful home we have always wanted.

We have big plans for actual renovations, updates, and personal touches, but for now, with the need for a budget-friendly fix, we are so happy with the changes we have made. When we moved it, our first order of business was to repaint the main living spaces to take care of the dingy feeling of a home that had not been lived in for over two years. This went a long way, but we had even bigger plans for a couple choice rooms.

First, we focused on our son's new bedroom. It was very hard for him to leave our first home. To help him get excited about the new house, we let him choose the colors/theme of his new bedroom, which we would have up and ready by the time we moved in. Little did we know, that he would choose two, lets say interesting, color choices. Red and golden (he also threw black in there, but that's where we drew the line). It took us weeks to figure out a way to give him what he wanted, while still making his room tasteful and doable for us. A friend made an awesome suggestion, and we went with it. We painted the top of the room white, the bottom red, and added a golden stripe between them. We all loved the outcome, especially our little man.
Before                                             After  
Next up was our spacious but blah loft. We have always planned for this area to be a playroom for our boys, but the whitish walls made the room seem boring and dirty. So, we found a kid friendly color pallet and chose two colors that would look well together. We painted the top two thirds of the room the lighter of the two, and the bottom third the darker. We then added a chair-rail to tie it all together. I LOVE this room! I have always wanted an older home with character, and I think that our remodel gives it just that. Character!
Before                                                After 
Last, was our half bath. Once again, the room was dirty and white. This time, we had to worry about it about the size of the room when considering colors. Since the bath is quite small, we wanted a light, neutral, yet interesting color. We chose a light blue/green. We also switched out the boring, plain mirror for one with lots of character. These two small fixes, have given the room a huge improvement.
Before                                             After
As I said earlier, we still have some BIG plans for the rest of the house, but these easy, inexpensive changes will help to tide us over until we are ready to make bigger updates. The fact that this will be our home for many years to come, makes each of the projects we complete, all that more satisfying and exciting. We can finally make our home, ours!

Wednesday, July 9, 2014

Crockpot Korean Fusion Pulled Pork Tacos with Spicy Slaw

Our family has been working on a pretty tight budget for the past couple years. As part of our budget, I do the grocery shopping with special focus on coupons and sales. One item that tends to go on sale often and has coupons in the Sunday paper regularly, is the Campbell's Crockpot sauce. Since we are not fans of eating the same three dinners, over and over again, we try very hard to come up with creative recipes that will use the items we have already purchased (based on sales and coupons). 

This is one of my proudest recipes to date. It is healthy, delicious, inexpensive, easy, our whole family loves it (even the 4 year old and the 18 month old), it makes a ton of food, and it even better as leftovers, which is HUGE for me to say. I HATE leftovers! 

The delicious outcome
Ingredients:
Boneless Pork Shoulder
Korean BBQ Campbell's Crockpot Sauce
2 Cups Shredded Cabbage
1 Cup Red Onion
3/4 Cup Cilantro
Corn Tortillas

Sauce:
2 Tbls Soy Sauce
3 Tbls Vinegar
1 Tbls Sugar 
1/2 tsp Ginger
1/2 tsp Black Pepper

Optional (for spicy):
Diced Serrano Pepper or Diced Jalapeno Pepper to taste

1. Put the Pork shoulder into a crockpot with the Korean BBQ sauce as directed on the package  (until the meat falls apart easily) 
2. Shred the pork.
3. Make the sauce, adding the pepper(s) if wanted.
4. Mix all remaining ingredients to make the slaw, then mix in the sauce.
5. Put the tacos together, adding as much of the slaw as you would like.
6. ENJOY!!

*My husband and I love spice, so we split the slaw into two batches and only add the peppers to one of them. That way we can have spice, and out boys can enjoy their meal without a burning tongue and watering eyes.

We hope you love this recipe as much as we do!!! Please, give it a try and leave a comment about how it turned out. I would love to hear about variations and/or issues that you come across.

Monday, July 7, 2014

Super Hero Party

My son is a huge super hero fan. He loves them all, but his favorites are Flash and Hulk. When it came time to choose a theme for his party, he couldn't decide between the two. So, he didn't! 

I love to be creative with parties. I find nothing but pleasure in planning and throwing them. I try to be creative with theme, decorations, party favors, food, etc. Once again, I scoured my brain for ways to make sure that this Super Hero party wouldn't be a generic, cookie cutter version. My first assignment, was the food. There is an amazing bakery, here in Sherwood, that creates beautiful, yummy treats. We used them a few years back for another one of Liam's birthday parties. We asked them to create Hulk hands and Flash lightening cookies. They turned out awesome, and were a huge hit!

The next order of business was themed (yet, not canned) decorations. I went simplistic this time around. Putting out colored table clothes, napkins, plates, and silverware and pairing them with a few of Liam's toys. I put together a themed table for each of the heroes, and moved on to more important things......party favors!


I have to say, that this is one of my proudest party ideas. I'm a reading teacher. My boys love books. Normal party favors tend to be cheap toys, candy, and nick knacks that are thrown away. I wanted to make Liam's party favors useful, memorable, and worth taking home. So I went with books!

I searched local book stores, Facebook buy/sell pages, and garage sales, for new/like new children's books. I was able to come up with quite a stash for less money than the normal goodie bags would require. I displayed the book options in a decorative basket, near the front door, so as not to forget them. This also allowed the children, to flip through and choose the book that they wanted, while heading out.

To personalize the gift for Liam and his guests, I typed up and printed a little note on address labels and stuck them on the front cover of each book. Once again, our guests loved the idea! I have received more compliments on this idea, than any other. I'm so happy that everyone liked it, and I love that it promotes reading!


The last hurtle to get the party started, was an activity for the kiddos. I hate party games. Especially, for infant/toddler parties. Kids just want to play. Party games are complicated, can be difficult to organize, and they require that someone who is throwing the party, be taken away from their guests to facilitate. I'm just not a fan. In past parties, I set up a cookie decorating station, homemade playdough, Mr. Potato Head felt game, and created a punch for the prize game, You can check out these ideas at Teddy Bear Picnic Birthday Party and To Infinity and Beyond!

This time, I created bookmarks that went along with the Hulk/Flash theme. I printed them in black and white, and put markers and crayons on the same table. This way, each kiddo would leave the party with a book and bookmark that they colored, and would have a fun, calm activity to do, while at the party.

This was a super easy and simple way to throw a birthday party, and I got nothing but compliments for how it turned out. I learned that parties don't need to be fancy, expensive, and super-structured to be a hit. They just need to be well thought out and creative!

Saturday, June 14, 2014

We're Broke

I've been considering writing this post for some time now, but always decide against it for various reasons. I have gotten to the point where, I just can't wait any longer. Our friends and family need to know why they hear "No." so often.

The Brooks family is broke. Sort of. We are not broke in the sense that we don't have money that could be dispensable, we do. We are broke in the sense, that it is gone, used, has a purpose. My husband and I, chose to go down the debt-free future path, about two years ago. We have worked hard, and paid off a lot of debt. But selling our house, renting, then purchasing our forever home, put our debt-pay-off-plan on hold for about 9 months. We are finally getting back to it, and have set a pretty lofty goal for ourselves. We want to pay off one of our student loans by this time next year. It is doable, if we stick to our budget......if we say, "No."

Smart Advice from Mr. Dave Ramsey
I hate to disappoint people, especially the people I care about. So when we are asked to go out to dinner, go to a movie, take a trip etc., it's very hard to always say the same two letters: N. O. It's also hard to feel as though we are skimping on things. When we give gifts, they are small, simple, basic. When Christmas or birthdays are approaching, it takes months of planning ahead, and a great deal of budgeting to get the job done. Although it seems counter-intuitive, this a major reason for putting our family on a budget. We want to send our parents on that trip they have been dreaming about. We want to pick a gift, based on the interests of the person, not the price tag. We want to be able to be the generous, thoughtful people, that we wish we could afford to be. We want to travel as a family. We want a future free of the stress associated with debt.

We don't want our friends and family to stop including us (or trying to), we don't want to be thought of as "cheap" or "stingy". It's quite the opposite. We want to give ourselves the opportunity to be the "yes" people in the future. With debt hanging over our heads, we would never truly feel comfortable with larger purchases, family/friend vacations, dinners out without reading every price on the menu, or shopping for ourselves without feeling guilty. Becoming debt-free will help us do all of these things and more, while still being responsible and thoughtful about our money.

Joe and I, own our choice. We stand by it. It doesn't bother us to miss out on these situations for the time being, because the goal is that we will be able to enjoy them in the future. We want to instill smart finances, and financial responsibility in our boys.

I don't feel sorry for us. I'm proud of our choices. My goal is for the people around us to understand WHY we say, "No.", WHY this is important to us, WHY we make the choices we make.

Our Debt-Free Future Inspiration


Monday, January 27, 2014

Teddy Bear Picnic Birthday Party

Since my baby boy was a wee squiggle, swimming in my tummy he has had two nicknames- Gummy Bear (given to him by his Auntie Alyssa, because she said that he looked like one in the ultrasound photo), and Teddy Bear (his middle name is Theodore, after my husband's grandfather). So it was only natural that his first birthday go along with these nicknames. In searching for Teddy Bear themed party ideas, I quickly realized that everything was for baby showers, and NOT birthday parties. Well, I wouldn't let that detour me! I had done a home-made birthday party before-my oldest son's 2nd birthday was Toy Story themed, and I made everything from: activities, decorations, signs, cupcakes, snacks, games, art projects, etc. I could do it again..........so I did.

I scoured Pinterest for ideas, then I was on the prowl for anything and everything that just might work. I don't know if I'm extremely lucky, or if planning ahead, looking in several places, and being open to changes is the answer, but it all fell into place perfectly. I love the Teddy Bear Picnic song, and we have a plethora of the stuffed scoundrels lying about our home, so once again.....I went with it.

Here is how it turned out, where I purchased the supplies, how I made the projects, and other miscellaneous things you might want to know, when planning a similar birthday extravaganza:

 Don't Forget Your Disguise!
A line in the song refers to all the Teddy Bears wearing a disguise to their big party, so our guests got to wear them too. Bear-ear hats were waiting right inside the door, with a sign reminding them to take one. They were easy to make, only required a sharpie and brown paper, and the kiddos LOVED them. They wore them all day, and many took extras home.


Teddy Bear Picnic Table
This is the "picnic" table where the goodie bags, and yummy treats were housed. Gummy Bears, sandwiches, Teddy Grahams, Trail Mix, cupcakes, and adorable bear cups to store the tasty treats, were laid out for snacking.


Teddy Bear Picnic Framed Lyrics
Also, a Dollar Store picture frame displayed a verse of the Teddy Bear picnic song. These were placed throughout the house for people to read. I tried to match the verse with the activity that would take place in that area. Now, these verses are hanging in my Teddy Bear's bedroom. What a great keepsake!

Picnic Party Favor
Each child that attended the party went home with a Teddy Bear plate, set of silverware, and a Teddy Bear storage container filled with gummy bears or teddy grahams (depending on their age). I was told by several parents that they loved this idea, because their kids were getting something they would actually use. The kids were begging to eat dinner with their new plates/silverware, so I'm guessing that they liked the idea too.

Cookie Decorating Station
This was one of the best ideas! The kids absolutely loved decorating their own teddy bear cookie. It was nice for me, because that was one less thing I had to prepare before the party, and it was nice for the parents/kids because the kids were entertained. It was extremely easy to set up, required little time, and was very inexpensive.

1st Birthday Picture Collage
I made one of these for my older son's second birthday, and it is still hanging in his bedroom almost two years later. It was a mommy-favorite, and more than anything, I wanted to do it again for my little Teddy Bear. Cut out the number needed from a cardboard box, glue/tape pictures to cover the cardboard, then hang! It's so fun to see the changes in your baby when sorting through the pictures, and it's fun to reminisce with party guests when they take a peek.
 Easy Teddy Bear Cupcakes
This is the easiest decoration idea yet! Bake cupcakes, frost, stick a teddy graham on top. Done. Quick, easy, inexpensive, and everyone loves a cupcake with a little something on top.

Teddy Bear Ice Cream
No picture of this sweet treat. Sorry! But it is also a wonderful way to make good use of that cookie cutter. We thawed, then refroze ice cream into a foil pan. Then when it was time for ice cream, we pulled out our trusty cookie cutter, and used it to "scoop" the ice cream. There was a little trial and error (1.take the ice cream out and let it sit for a bit before trying to cookie-cutter it. 2. Warming the cookie cutter under hot water first really helps), but it was so so cute, and the kiddos were so excited to get a teddy bear-shaped ice cream.

 Teddy Bear Sandwiches
These were awesome! Everyone loved them, and they were so easy to make. Since bears like fish, we made tuna sandwiches, then used the same cookie cutter (we were getting as much use of the thing as we could) to cut out adorable little teddy bears. I'm still in love with this idea, and I think I will try to do it again for future parties of various themes.
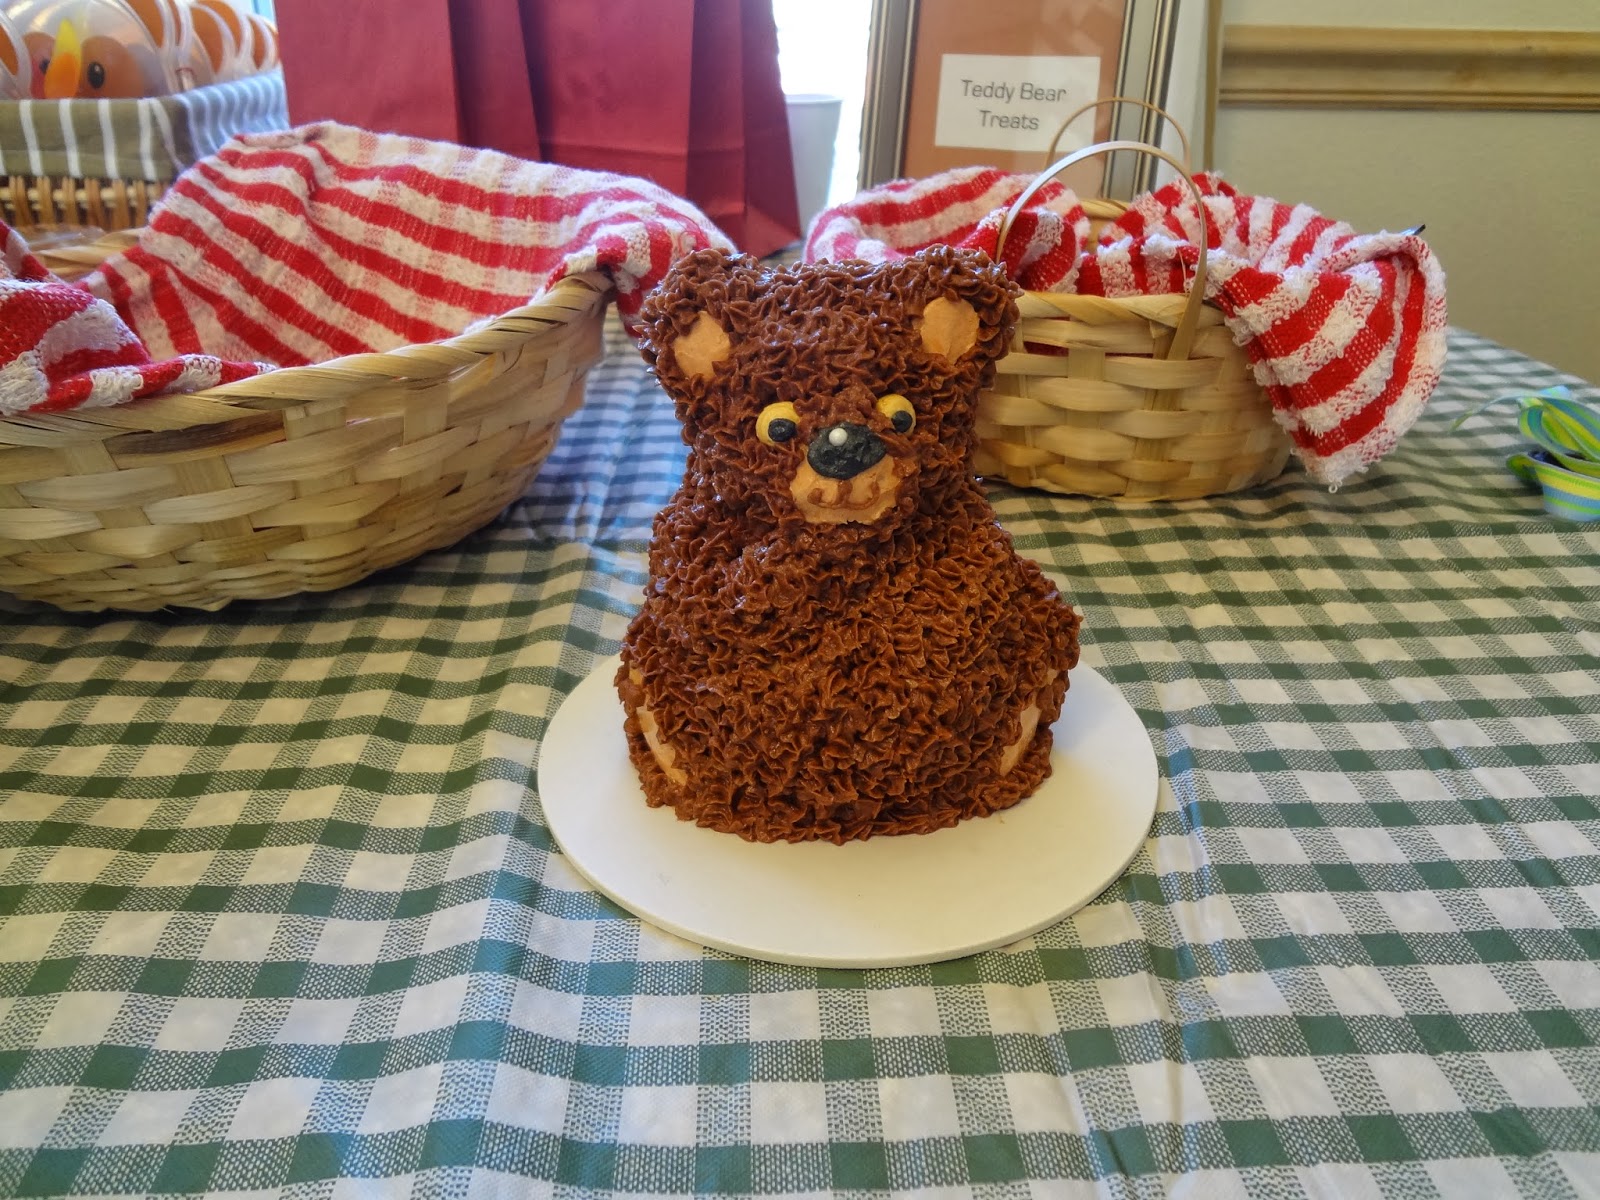
Teddy Bear Smash Cake
Everyone one year old needs his or her own cake on their birthday. We enlisted the help of the boys' Meema in making a teddy bear cake, just his size. It was perfect for our little guy, and it was oh so sweet!

In the end, I'm so glad that I couldn't find any generic red and blue checkered plates with teddy bears on them. I enjoyed making this party unique and special, and I enjoyed seeing how much everyone who attended enjoyed the little touches. More than anything, I love that I can show my little Teddy Bear pictures of this wonderful day, and tell him that his mommy did this all for him!

Thursday, October 31, 2013

Homemade Halloween

All Dressed Up!
This year, we went all out making our Halloween fun, and homemade. We started out the day, by making Liam's favorite pumpkin muffins. He loves helping in kitchen, and he loves it when we take the time to make something special on a school day. After eating our yummy breakfast, we headed out to his preschool Halloween party, where he got to wear is costume all day! When the work day was finally over, we all headed home to get into our costumes, and head to the Great Grandparent's house to visit.

Homemade Juice Box Costume

Liam decided that he would be "black Iron Man", also known as War Machine. I ended up in an old man costume- an old sweater of Joe's, a golfing hat, and glasses that came equipped with a big nose and a mustache (all found in Liam's dress up stockpile). Nolan was, thanks to his brother's awesome suggestion, a juice box. I spent the past few days trying to make his costume just right. I wasn't 100% happy with the finished product, but I will always love it, as I made it, and it was his first Halloween costume.

Hot Dog Mummies!
When we returned from our visit, we had a yummy, festive dinner of hot dog mummies! Liam LOVED them!! They were the perfect Halloween dinner, in that it was super quick, easy, required only two ingredients, and a kid favorite. Liam's favorite part was adding the "blood" (ketchup), and biting off the appendages.

After eating, we were finally ready for Trick or Treating! This was the first year Liam really seemed to be into it. He was leading the pack yelling, "Come on guys!" the whole way. We got a ton of wonderful comments/compliments on Nolan's costume, which made Liam quite proud. But it didn't take long for my little man's legs to get tired, and we headed home to answer the door for other Trick or Treaters. Joe was super excited that he was actually able to use his strobe light and fog machine. We had a wonderful day!

Wednesday, June 19, 2013

How to Save for Your Child's Education AND a Vacation on a Budget

5-6 weeks worth of change
My husband and I have worked out a financial plan that will get us out of debt at a very fast pace. It has required some sacrifices, has taught us a lot about what is important and how to be more self-sufficient, and how to live with less, happily. There have been a great deal of unexpected benefits to our system. One such benefit is that we have an easy system for saving for our boys' future education, and either a vacation or vacation home. This system doesn't require any planning, no financial changes, and is the easiest idea to implement that we have ever had!

Here's how you do it: The only rules are that you live off of cash ONLY, and that you DON'T spend the change you accrue. That's it! We have set up an easy-to-use system that works wonders for us. We put a jar in a safe, hidden, and easy to get to, spot. Everyday, we empty our pockets, wallets, and bags of change, and put it into the jar. When the jar is full (it usually takes us a month to six weeks), we count it, sort it into three even piles of change, and disperse the funds into two piggy banks (for the boys), and the last third into a large container which will be our future vacation fund. When the piggy banks get full, we take them to the bank and deposit the money into our sons' bank accounts.

Sorting and counting
It may not seem like a great way to save for such expensive plans, but these plans are long term, and this system isn't as restrictive as signing the boys up for college funds or savings plans through companies that offer such things. We are chipping away slowly, but our boys are three and 5 months, so we have a long time to build up the money. I'm sure we could cut out the vacation/vacation home fund, if we wanted to, but we like the idea of having a family "reward" at the end. It's great motivation!

 It's also a great way to teach our boys about money, budgeting, planning, monetary values, counting, etc. We have made sure that Liam has been a part of every step in this. He helps us empty our pockets, puts the money in the jar, counts the money, puts it into the various banks, and helps us take the piggy banks into the bank when the time comes. I know he's learning great lessons, and so are we.

Depositing the $ into the "bank"
I like that this plan is painless monthly, and it works! Just this time around, we inherited $36 worth of change, that means $12 per "account"! Last time, it was even more. If we were to save just $10 a month per designated fund, we would end up with a $1,200 in EACH account in 10 years. All without missing a cent! Of course, we will probably supplement and add more money when we can, but this is a great way for us to continue to plan for these life events, even while on a tight budget.

Happy saving!

Sunday, June 2, 2013

How to Live Simpler, and Be Happier

When Joe and I decided that I should work part-time and be home to raise our boys more, we knew that we were going to have to make some big lifestyle changes. Not that we were ever "big spenders", but we did shop when we wanted, we bought the groceries that we wanted, we went out to eat pretty consistently, and we took vacations (all be it, small ones) a couple of times a year, without much thought. Those days are long gone, but not because we can't afford them, but because we have a new focus, new goals, and a new outlook on what's important.

When I made the part-time switch, we lost a fourth of our income. It would have required huge changes in and of itself, but about the same time, we decided that we needed to focus on paying down the mountain of student loan and car loan debt that we had built up. We wanted to be debt-free for our boys, for our future. So we created a budget (modeled by a good friend, and financial genius!), started using cash only, and re-prioritized.

Science experiments, instead of TV
Pancake picnic in our backyard

After about six months of putting all of our extra income toward the car (at a rapid pace), we became addicted and started looking into other ways to increase our extra cash, and decrease our debt. I started couponing, which has resulting in a stockpile of food I have only seen in mom and pop stores. This also became a bit of an addiction. We cut out internet, home phone, and cable (only internet has been renewed), and we had a couple of garage sales. I started planning ahead for birthdays, graduations, and other holidays by buying gifts when I found them on sale, whether close to their birthday/holiday or not. We made almost all of our Christmas gifts last year and I made Liam's big birthday gift, saving us hundreds of dollars, and once again, it felt good.

Since Nolan was born, we have made even more financial changes. We use cloth diapers (not exclusively, but it still cuts costs), we make our own cleaning supplies and laundry detergent, we expanded our garden-which we thoroughly enjoyed last year, I'm making baby food in preparation for Nolan's first eats, and we have become experts at finding cheap and/or free activities that are fun for the whole family. I have also become addicted (yes, I am aware that I have used this word several times) to "Buy and Sell" pages on Facebook. My family has purchased several amazing, previously loved, items at shockingly low prices, and have sold enough to, not only balance out our purchases, but some extra as well.

Lunch date with Daddy
Planting basil in the garden
We have learned where we can "cut corners" (which usually means, "make it better than you can buy it"), and we have learned to enjoy it. I'm not only excited to get our bills each month, but I'm excited to see what else I can do, that will make our overall situation more comfortable. It's crazy how much happier I am doing all of these things for my family and for myself! It's nice to feel like you are making a positive contribution to your family's financial future, even though you are making half as much money; that you are making lasting changes, and that your family is better off for them.

So here it is in a nutshell:

-Make what you can
-Grow a garden
-By used/sell what you don't use
-Coupon
-Use cash only
-Make a budget
-Pay down debt, and don't create more
-Use the library, Groupon, and other resources to find fun, cheap things to do
-Enjoy nature
-Get rid of "distractions" (cable, internet-if you can stand it....clearly I couldn't live w/o internet, but I lasted over a year!)
-Use a cell phone, not a smartphone
-Think ahead for holidays, birthdays, other celebrations
-Downsize your closet, your garage, your clutter
*Be happy!*

Doing these things will put you on track financially, help you use your time productively, and make you see what is truly important, your family!


Wednesday, April 24, 2013

Homemade Laundry Detergent and Multi-Purpose Cleaner

My husband and I have been working our hardest to pay off the mountain of student loan debt that we accrued. This is one reason why I went on a search for ways to cut costs and lower our monthly bills. One thing that I have started doing to help slash our grocery store bill, is to make my own household cleaners. So far, I've tried two of the many. many on my list. Here are the recipes for creating your own green, inexpensive, and healthy products.

Laundry Detergent:

- 4 Cups of Hot Water
- 1 Dial Basics Hypo-Allergenic Soap Bar (Dollar Tree 3-Pack)
- 1 Cup Arm and Hammer Super Washing Soda (Bi-Mart)
- 1/2 Cup Borax (Bi-Mart)

1. Grate the bar of soap into the hot water. Put on medium heat until soap is melted. Stir constantly.
*This takes quite a while, even with a small bar of soap, so plan accordingly.

2. Fill a 5 gallon bucket halfway with hot tap water. Add soap mixture, washing soda, and borax. Stir until everything has dissolved. Then fill the remainder of the bucket with more hot tap water and stir again.

3. Fill an empty laundry soap container halfway, then fill with more hot tap water.

4. Each time you use the soap, shake up well (it will get clumpy, if you don't). You only need about 1/4 cup for each load.

This one batch will last forever, and is much cheaper than even one jug of store bought laundry detergent. This soap works on front and top load machines, as well as high efficiency. I was a bit skeptical about the ability of this soap to get my clothes clean, but it does it amazingly! The laundry smells fresh and clean when it comes out of the dryer, and there is no need for fabric softener (at least we don't think so).
It has gotten stains out of my son's shirts that our regular detergent would not have gotten out without a stain remover. You can still use stain removing products with this detergent, if you need to. We are very happy with this recipe!

Original recipe from the Duggar Family website, but I changed the bar soap to fit our family's hyper-sensitive skin. Here is the link to their website: http://www.duggarfamily.com/content/duggar_recipes/30455/Homemade%2520Liquid%2520Laundry%2520Soap-%2520Front%2520or%2520top%2520load%2520machine-%2520best%2520value

Multi-Purpose Cleaner:

- Orange Peels
- Vinegar
- Air-Tight Jar

This is the easiest recipe ever, and you can use it for so many things! All you do, is fill a jar with orange peels, then fill with vinegar, and let it sit for two weeks. After two weeks, take out the orange peels and put the liquid into a spray bottle. Your done! This cleaner smells wonderful, and does a great job cleaning all sorts of things. I love it because I can use it on our kid's toys and in our kitchen, without worrying about chemicals. This cleaner is cheap, easy, and green.

Sunday, April 22, 2012

To Infinity and Beyond!

Liam turned two earlier this week and his birthday party was today. It was wonderful! So many of our amazing family and friends came to help us celebrate a huge milestone in our son's life. In preparation for this day, I have been getting crafty! For the past few weeks, I have been working on project after project to help make his big day a special one. In this blog, I will share all of the fun ideas that I had, borrowed, and just plan stole from friends and the creative geniuses of Pinterest.
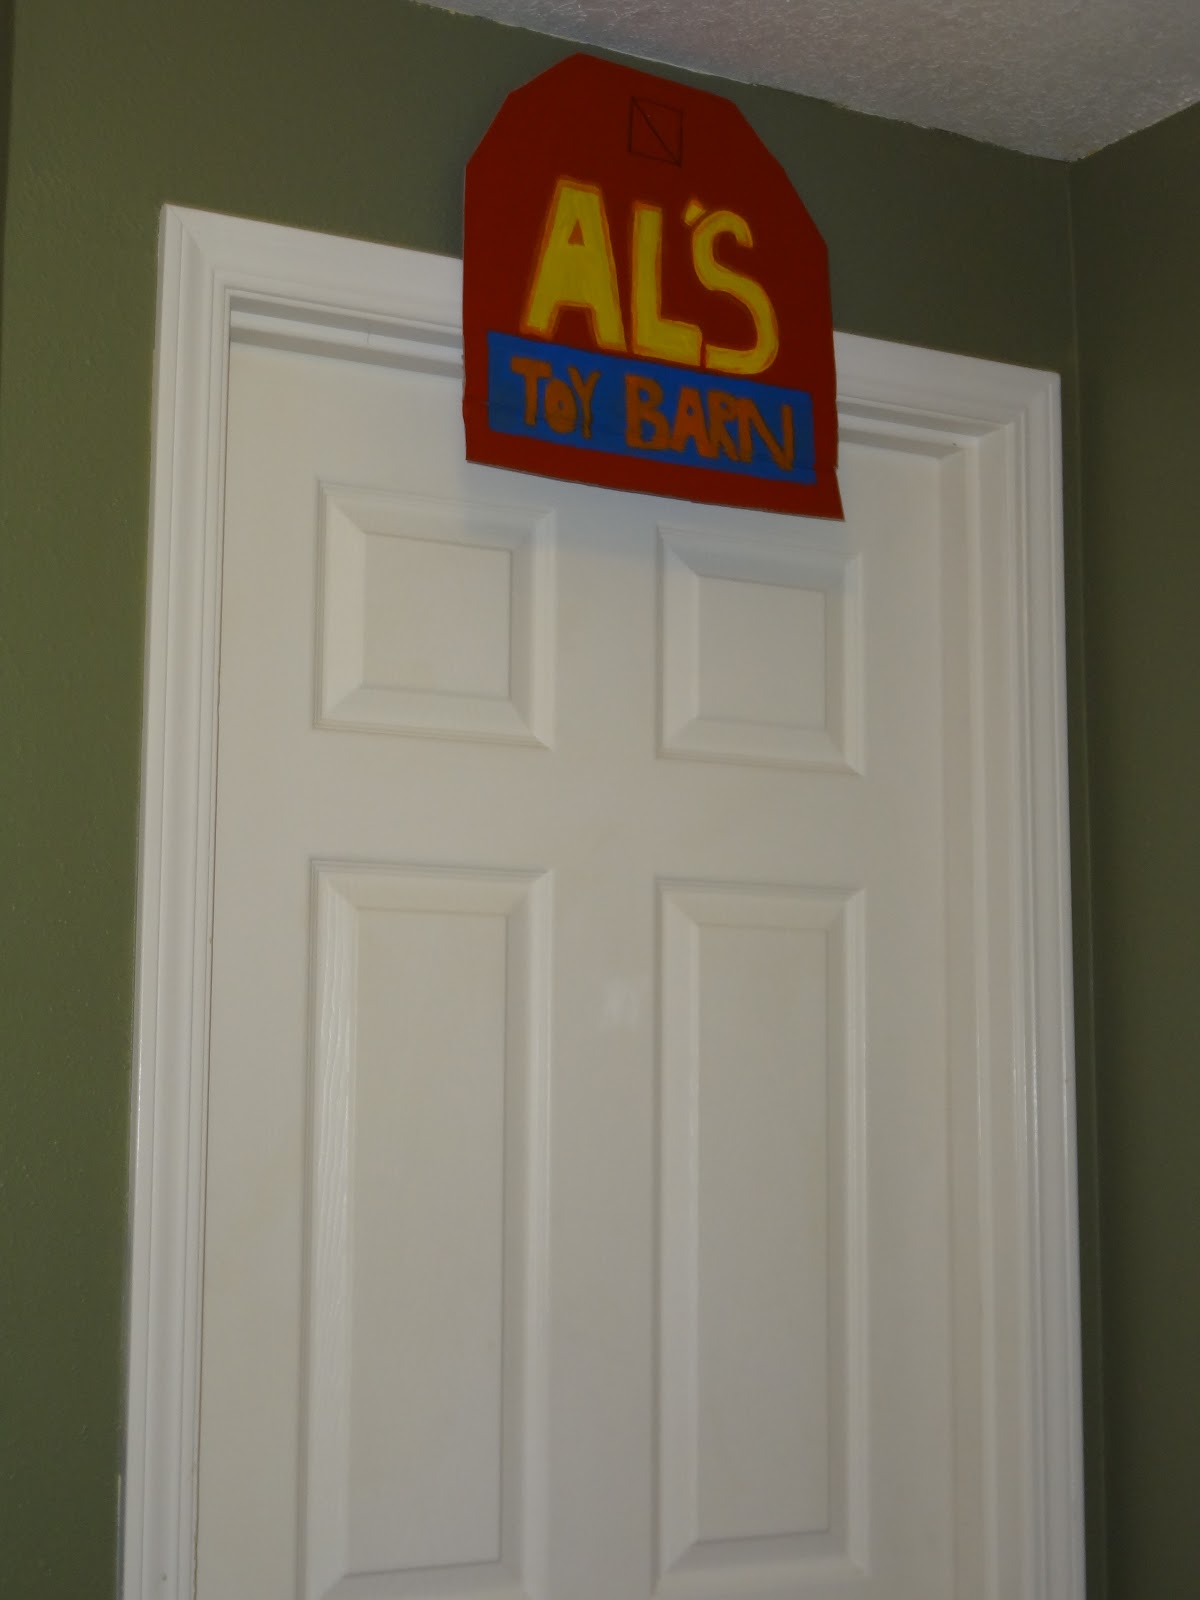
My first assignment was to create signs that would not only reflect the Toy Story theme of the party, but also inform guests of activities, food, and where the party was taking place. I started this project with the cardboard that was left over from our closet/bedroom renovation project (we were lucky to have so many boxes). I used graphics found on the internet and Toy Story products to draw the words on the cardboard, then I used a box-cutter to cut them out, and painted them using the colors shown on the logos.
The door to the playroom
Over the island in the kitchen

Welcoming guests at the front door

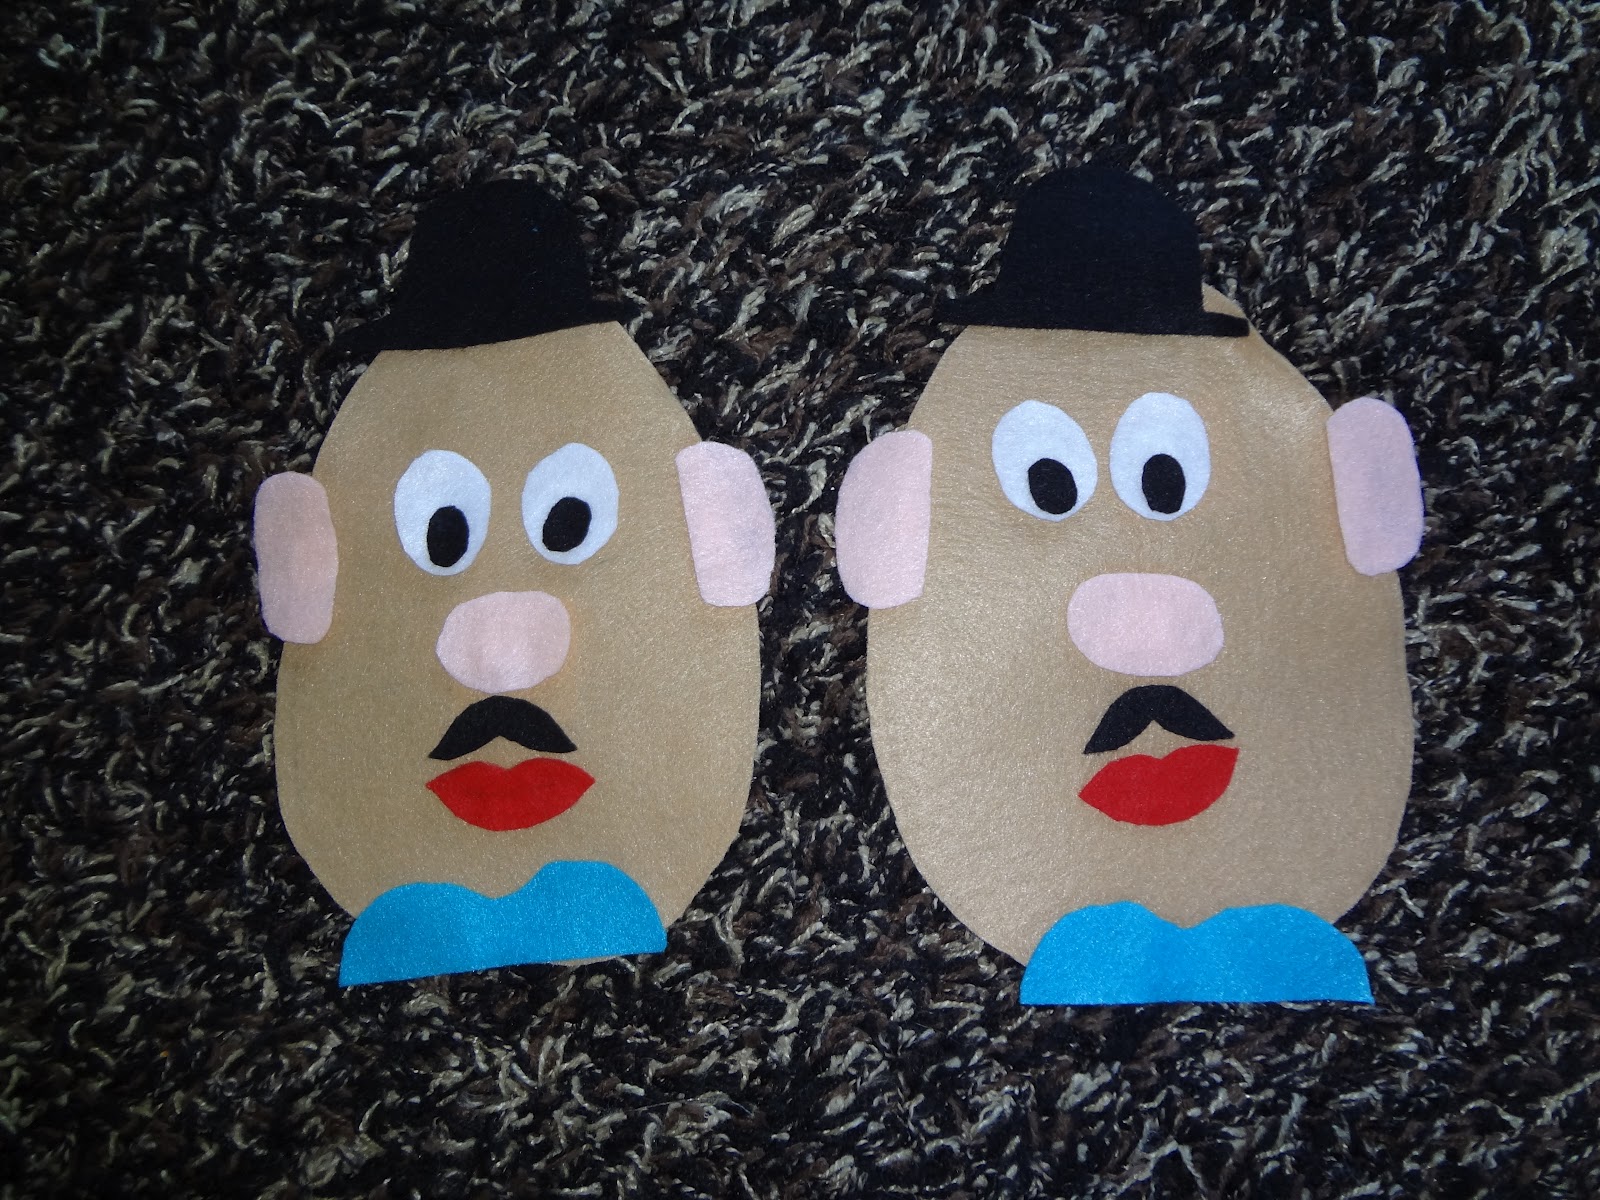
Next, I used felt to create a "pin the body parts on Mr. Potato Head" game. I bought one small sheet of felt in each color needed, then cut out the body parts. Last, I glued the prickly side of a velcro strip onto each feature. They turned out great, and the kids loved it!

I also made a beautiful collage of all my favorite pictures of Liam, shaped in the number two. I started by drawing a large, block number two on a large piece of cardboard. Then I used a box-cutter to get rid of the edges. Finally, I was able to tape each picture on to the cardboard, being mindful to keep the shape. This is my favorite project for sentimental reasons.


The most time-consuming, yet most rewarding project, was the gift bag punch box. I once again, started with a large cardboard box. I used a box-cutter to create 15 holes on either side of the box. I didn't care if the holes looked nice, they would be covered anyway. Then I had to use another box to create shelves on the inside. I used one piece that was large enough to go width-wise and top to bottom, to create an anchor for the shelves. Then I cute four pieces that had the same dimensions as the inside of the box, cut them in half length-wise, and taped them to the anchor piece. Next I put two pillars between the holes to divide each bag from the others and to support the shelving.


Once the inside of the box was complete, it was time to make it look pretty. I chose to cover the whole box in some balloon wrapping paper I already had. But I needed to create the nice, neat holes first. I measured the distance from the bottom of the box to the first hole, then measured the same on the wrapping paper. I used a tupperware lid to trace the circles, then cut each one out. When I was done with this, I taped tissue paper onto each row, covering the holes. I highly suggest doing this after creating the holes on the paper, so that you can see the holes on the box, and can check your measurements.


I realized when I had finished, that there was a pretty good-sized space left where you could see the box. Instead of going out to buy more paper, I created a mosaic from the scarps cut from the circles. It turned out really nice. I chose to create the punching holes on both sides of the box. This is not needed, but we had more than 15 kiddos at the party and I decided to use it to dole out the prizes for the games as well. The kids LOVED this! It was a great way to make the gift bags even more fun.


My last project was to make stary sky play-do. I have never made play-do before, but it turned out awesome! I used black and blue food coloring and silver, white, and blue sparkles. It went great with the Buzz Lightyear theme.

There were also some projects that I did not necessarily "do", but had a part in. My husband's step-mom is a wonderful baker and is amazing at cake decorating, so I designed a cake and she made it for us. Once again, I was happily surprised when my idea turned out better than I thought (quite possibly due to Clair's fantastic skills). The food we chose was also well thought out. I watched the Toy Story movies to find snacks that would go along with the theme. We ended up with chips (cool ranch and BBQ), cheese puffs, and pizza (of course).


I have to say, that putting this much effort and time into one event was exhausting, but well worth it. Liam's smile and comments from our guests, told me that all of my effort was noticed and appreciated.